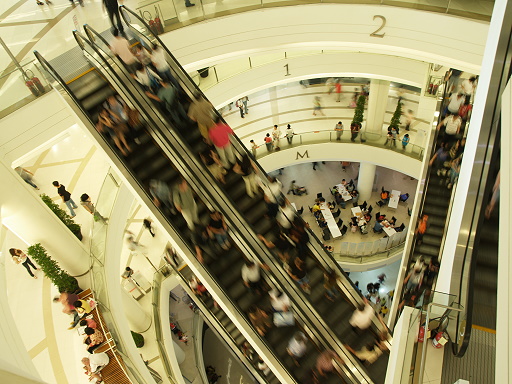
From LifeType to WordPress

It’s not easy … there’s a lot of works to do the move and I really like LifeType a lot. Anyway, I suppose it’s time to move on after the crash. So here is a what I did to make the move (without any use of migration scripts).

  • Install the Zoundry zBlogWriter, set up the blog and xmlrpc.php configuration to connect to the old blog. Download all the old blog posts to your PC.
  • Install the WordPress in a new directory in your server. For example, http://www.xxx.com/wordpress/
  • Within the new WordPress installation – create the same set of categories, set up the same Permalink format you had from the old blog engine. And if you prefer, find and install a good-looking theme.
  • This step is very tedious … be patience. From within the zBlogWriter, set up the new blog configuration. And now edit the blog posts from the old blog, and republish the post to the new WordPress blog one by one. Make sure you select the same categories and use the “reset” function to set the same old blog time.

    • One of the LifeType features is you store all your photos in its “Resource”. So the next step is to create a new directory in your server (I name it “blogphotos”) and move/copy all the photos from the “Resource” (in Lifetype, those files are stored in a directory /blog/gallery/) to the new directory.
    • The above steps will not migrate the comments (!). So the next step is to find the right post in the new engine and then recreate the comments one by one (by referencing to the old engine). But since the comment time are wrong, so go to the WordPress admin, edit the comments and enter the correct time (again, by referencing to the old engine).
    • After all these steps, you will have two working blogs – your old http://www.xxx.com/blog/ (the LifeType) and the new http://www.xxx.com/wordpress/ (the WordPress one). Now rename the old blog directory to something like /blog_lifetype/ and your new blog to /blog/.
    • You now have the new blog working … but the second last step is find out all the posts that with missing pictures – since your new blog don’t have a LifeType’s resource directory. Now re-edit all these posts, and point the photos to the new directory you created before – i.e. the /blogphotos/ (smart, isn’t it?)
    • And what’s the last step ? That is … publish this post !!

      Hope it helps.

      Google Saves The Site

      It’s really scary … I forgot how many times I upgraded my blog engine (you know from version 0.32 years ago to now version 1.2.1) but this time the installation procedure or myself screwed up. After upgrading the engine to the latest version last night, and ran the so-called “installation wizard”, all my blog posts were gone !! All disappeared … A dead website.

      And because the upgrade is a minor one (from version 1.2.0 to 1.2.1), I did not backup the blog database before the upgrade … stupid me I suppose. All I got is a database backup in end March, even before the version 1.2.0. What could I do ?

      • Install back the old version (version 1.1.6);
      • Import the old data;
      • Search the latest blog post in Google;
      • From the result page, click the “Cached” link;
      • Found the web page cached image (with the latest blog posts’ text and pictures), and
      • Recreated all the blog posts from end March to mid April … one by one, from the Google image to the blog engine.

      Now as you can see the site is back online … and Google saves the site.

      User Experience – Complete My Album

      Apple® today announced Complete My Album®, a groundbreaking new iTunes service that allows customers to turn their individual tracks into a complete album at a reduced price by giving them a full 99 cent credit for every track they have previously purchased from that album.”

      Interesting. It’s interesting that it:

      • Turn individual tracks into a complete album,
      • At a reduced price

      But let’s see it from user experience angle … if you want to do it before the launch of this service … you need to do searches about the album, buy the rest of the songs in the album (as you don’t want to buy the songs you already bought), and all with multiple clicks and screens.

      Now … you can finish the whole task with only one click. I love Apple.